
Introduction
Azure VPN Gateway (AZVPNGW) Basic SKUs are only deployable with the Basic SKU Public IP Addresses (PIP). Basic SKU PIPs are dynamic and cannot be static, creating a potential issue for on-going S2SVPN connections.
To resolve these issues, you can use Dynamic DNS (DDNS) on-premise and DNS Names in Azure. With this setup Fully Qualified Domain Names (FQDNs) stay accessible, even when IP addresses change. Ensuring continuous connectivity, enhancing the resilience and reliability of your infrastructure.
Pre-req’s
Az Powershell module (optional)
- Install Azure PowerShell (PS) Module (or optionally use the Web CLI in the Azure portal)
- To determine if Azure PS Module is already installed, launch PowerShell and run…
Get-InstalledModule -Name Az*- If not installed simply run…
Install-Module -Name Az -Scope CurrentUser -Repository PSGallery -Force- Then login by running…
Connect-AzAccountOther (expected)
- Azure VPN Gateway (AZVPNGW)
- Public IP Address (PIP) dynamic
- On-premise Firewall
- Public IP Address (PIP) dynamic
STEP 1: Set Dns Name in azure

PS method
- Assign $pip variable with object of PIP properties
$pip = Get-AzPublicIpAddress -Name pip-test-2 -ResourceGroupName rg-test-1- Set DNS Name. In this case its a Basic SKU PIP, so we need to use a hashtable assignment.
$pip.DnsSettings = @{ DomainNameLabel = "mydomain-test2" }- Update PIP with new DNS Name
Set-AzPublicIpAddress -PublicIpAddress $pip- Confirm change
$pip.DnsSettings
Portal UI method
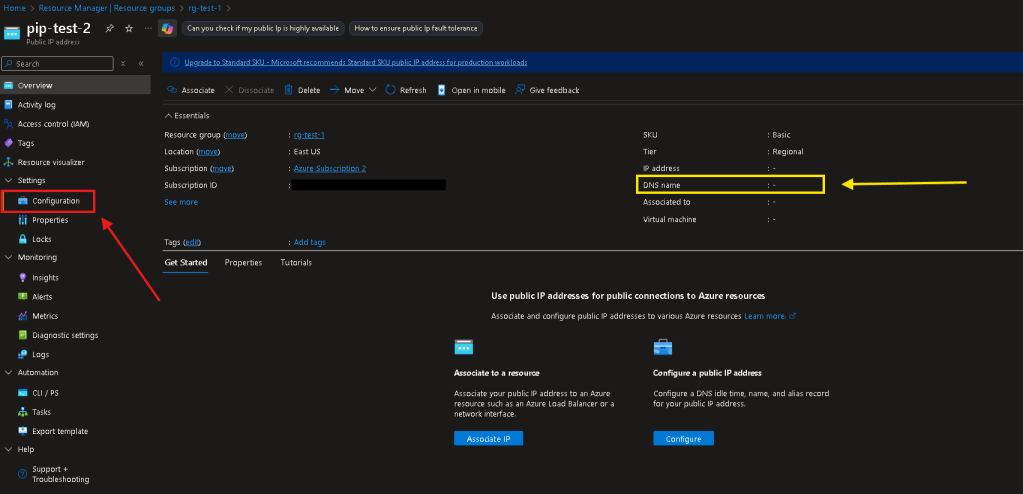
- Navigate to your PIP > Select Configuration on the left-hand pane
NOTE: On the right-hand side you can see the DNS Name is currently NULL
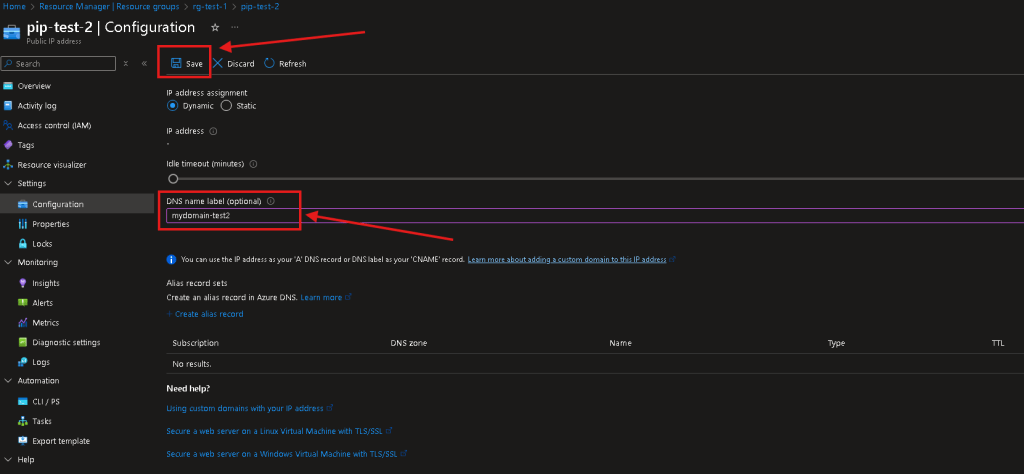
- Under Configuration > Select the textbox under “DNS name label” > Enter your DNS Name for your PIP.
- Remember to select “Save” when done.
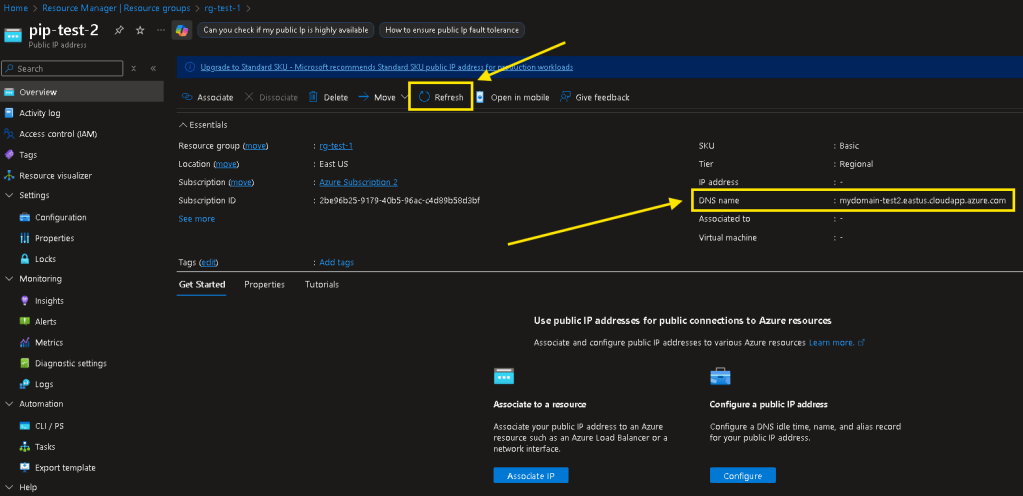
- On the left-hand pane, navigate back to “Overview” > Select “Refresh” > verify your DNS Name now shows the custom one set.
Step 2: Setup ddns on-prem
firewall setup
Many firewalls support Dynamic DNS (DDNS) natively. However, depending on the firewall brand your setup may look different. In this case we’ll use NO-IP on a Omada TP-Link Firewall.
DDNS (NO-IP)
- Setup a free account at noip.com
- note: this will be good for 1 DDNS domain and need to be confirmed every 30 days, you can optionally pay for additional
- Navigate to “DDNS & Remote Access” on the let-hand pane > Select “DNS Records” > Add Record
- Enter your desired domain name & current WAN IP address.
- In the setup wizard ensure you check “Enable Dynamic DNS”, at which point you’ll be provided with a username/password for the DDNS service.

Firewall (Omada TP-Link)
- Navigate to Services > Dynamic DNS > NO-IP
- Select the following settings:
- Interface: WAN
- Account Name: Username (from NO-IP)
- Password: Password (from NO-IP)
- Domain Name: Domain Name (from NO-IP)
- Select OK/SAVE to enable.

Step 3: Setup Azure local network gateway
PS method
- Create local network gateway using FQDN (DDNS name)
New-AzLocalNetworkGateway -ResourceGroupName rg-test-1 -Name lng-test-1 -AddressPrefix 192.168.0.0/24 -Location EastUS -Fqdn mydomain-test2.ddns.net- Verify…
Get-AzLocalNetworkGateway -Name lng-test-1 -ResourceGroupName rg-test-1
Portal ui method
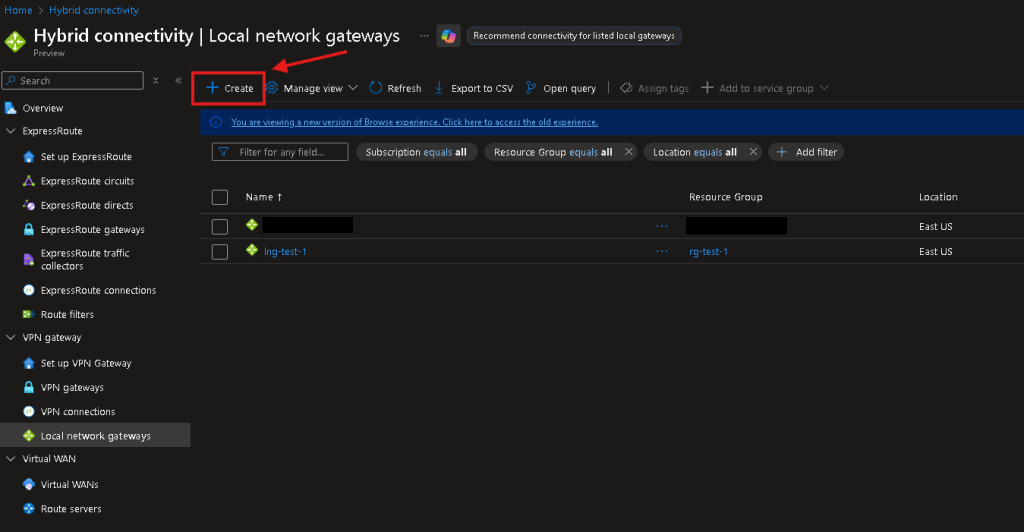
- From the Azure portal, navigate to “Hybrid Connectivity”
- On the left-hand pane, select “Local Network Gateways”
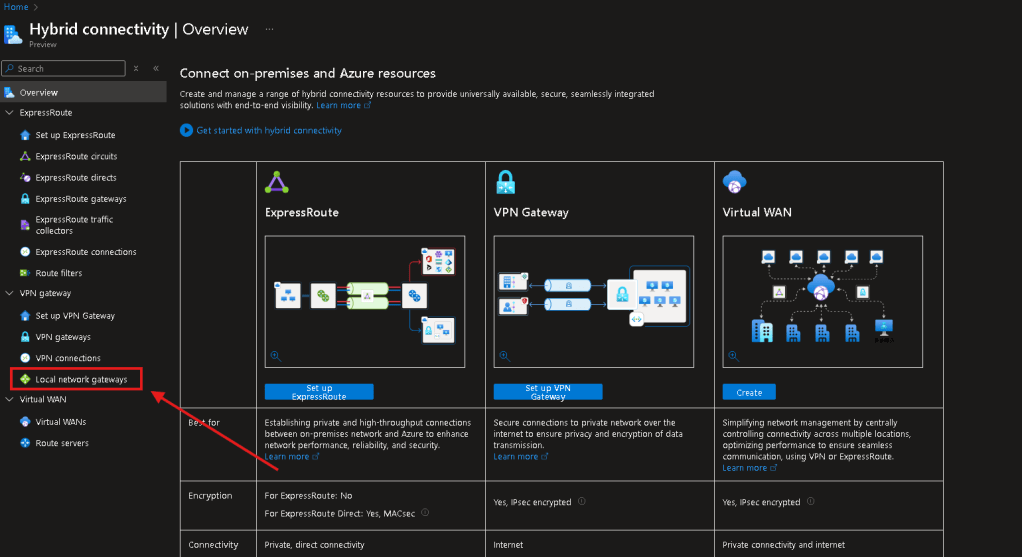
- Select “Create”
- Enter all details as desired, but ensure to put…
- Endpoint: FQDN
- FQDN: <yourNOIPddnsdomain>
- Address Spaces(s): your on-prem LAN to be broadcasted over S2SVPN
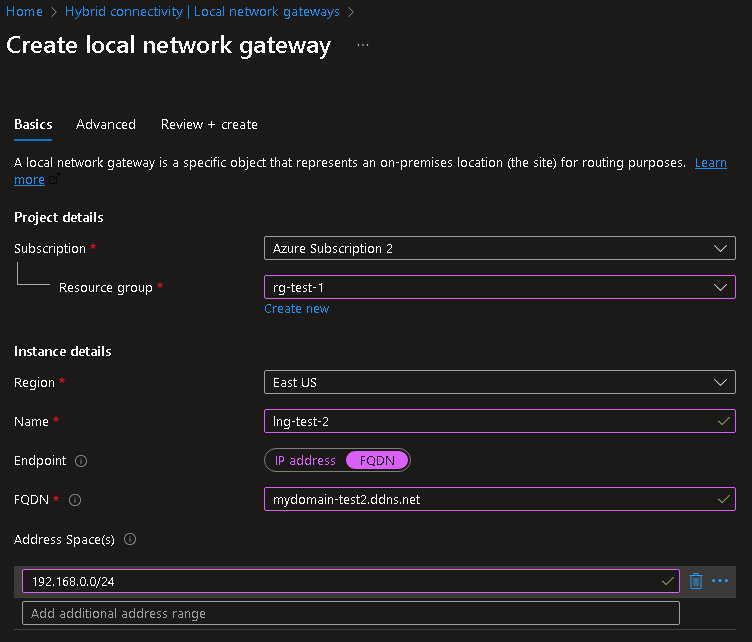
- Select “Review + Create” till completed.
Conclusion
At this point you have…
- An Azure VPN Gateway + Public IP w/ DNS Name
- Your on-prem Firewall + Public IP w/ DDNS setup
- Azure Local Network Gateway defining your on-premises network using DDNS FQDN
All that’s left is to setup your connection resource(s) in Azure & the IPSec tunnel policy on-prem. You can now use the FQDN on both ends for the Remote Gateway connecting the tunnel. This ensures your tunnel remains operational even when PIPs change.
Check out my other article for detailed information on setting up Basic SKU IPSec S2SVPN tunnels.
If you’d like to learn more or need help deploying DDNS in your environment, feel free to reach out to AlgoITPro for consulting and implementation services.
